
For years now I have been using DaVinci Resolve Studio as my primary color grading platform, and most recently it has become my go-to non-linear editing (NLE) software, too.
As a director, editor and colorist I wear many hats on a daily basis, and it’s critical to my success as a filmmaker that I am using tools that can enhance the speed and quality of my work, without getting in the way of the creative process. DaVinci Resolve 12 fits that bill and then some, which is why it was the natural choice as an end-to-end editorial and finishing system for my latest short film, “Stray.”
Why Resolve?
As an editor that is extremely comfortable in both Final Cut Pro X and Adobe Premiere Pro, amongst other editing programs, I had no shortage of options when it came to choosing an NLE for this film.
“Stray” was shot on the Blackmagic URSA in CinemaDNG RAW, so I knew that the workflow and overall post-pipeline would be streamlined simply by the fact that I could edit and grade the RAW files natively in the application. Had I chosen to work in FCP X for instance, I would have still needed to convert my RAW media via Resolve first (to ProRes) before editing in FCP X, and then eventually roundtrip back to Resolve for color and finishing.

A still from the short film “Stray”
Working in a truly integrated system that allowed for an end-to-end completion of my project gave me the possibility of floating between my edit and color correction effortlessly. While a more standard workflow calls for a completed picture lock before color correction, I benefitted immensely by having the ability to jump between the edit and color tabs, allowing me to experiment with creative ideas on the fly.
Here is a breakdown of the steps that I took throughout the process.
1. Importing and Media Management
As with any editorial project, my first step was to import all of the RAW media shot on the Blackmagic URSA, and organize and log everything accordingly. We didn’t have a ton of footage on this project since our coverage was kept to a minimum, so the process went very quickly. I simply labelled all of the video clips with their scene and take number, and then did the same for the audio clips since they were recorded externally to a different device.
From there, I utilized the audio syncing function in Resolve to automatically sync up the audio and video clips. Resolve 12 is particularly strong in this area, as the process is limited to two very simple steps:
Step 1: Import all of your media (audio and video) into a folder.
Step 2: Right-click on the media and select “Auto-Sync Audio Based On Waveform.”

Auto-sync
Just like that, each and every clip is scanned and synced accordingly. There are also options to sync via timecode and to retain your original audio tracks (in addition to the new tracks), but in the case of this film I didn’t need to utilize those functions.
If Resolve had any issues syncing the audio files, I could have easily referenced my original scene and take names and synced up certain clips manually. Resolve did a flawless job of syncing automatically, though, and I was just about ready to start editing.

The “General Options” menu tab
But before jumping into the edit itself, I used another new tool inside Resolve: the “Generate Optimized Media” function, to convert my RAW files from CinemaDNG to ProRes. Even though Resolve 12 has the ability to edit the RAW files natively, my computer system simply wasn’t powerful enough to cut the 4K media with real-time playback without optimizing first. The fact that Resolve 12 can automate this type of proxy workflow right within the application is fantastic, not only for RAW files, but for other file types as well, such as H264.

“Generate Optimized Media”
Much like audio syncing, optimizing media is extremely straightforward. Right-click on the clips in your media browser that you want converted to a proxy format and select “Generate Optimized Media.” Resolve will automatically convert the files for you, and once the process is complete, you will have the ability to edit using either your optimized or original media. You can choose between the two by toggling the “Use Optimized Media If Available” item on or off on the Playback menu.
It’s also worth noting that you can change the quality and codec of your default Optimized Media format in the “General Options” section of Resolve’s Settings panel. For this project, I used ProRes 422 HQ at half resolution, which worked perfectly for my needs.
With the files now synced and optimized, I was ready to move on to the offline edit.
2. Editing
This film was shot with minimal coverage, so the creative editorial process was quite straightforward. The assembly cut was created by editing together only master takes for each scene, without the use of any cutaways or B-roll. The goal from a stylistic standpoint was to use long takes without any cuts whenever possible, so this first assembly cut wasn’t far off from the final cut.

“Stray” in assembly
That said, I still did have some coverage to work in (cutaways, reaction shots, etc.) as well as some other fine-tuning adjustments. Many shots needed to be reframed, titles needed to be added, and some cuts still needed finessing. Many of Resolve 12’s new powerful editing features came in handy here. Two of them are:
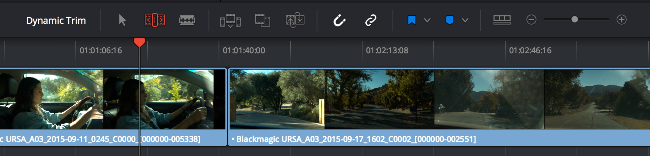
Trim Tools
Resolve 12’s trim tools are some of my favorite new features. They speed up my workflow drastically. While the tools themselves are similar to what you’ll find in other professional NLEs (ripple, slide, etc.), it’s the way that they function that is unique to Resolve. For instance, the tools are “context-sensitive,” which means that as you mouse over different parts of your clip in the timeline, your trim tool will automatically adjust. With most other NLEs you would need to manually change your tool before starting to work in your timeline again. This small feature in Resolve allows you to stay in the timeline, not losing your creative momentum.
This isn’t something that I needed to tap into on this project since our cuts were relatively simple, but asymmetric trimming is also possible, and allows you to adjust multiple clips in different directions simultaneously.
Trim tools
Titling
One of biggest issues with many editing applications today is poor titling tools. Adobe Premiere Pro in particular has a strange titling function that feels very counter-intuitive. Resolve 12, on the other hand, has one of the slickest and easiest titling tools that I have worked with to date.
Creating a new title is very simple. After opening up your Toolbox (in your “Effects Library”) you can scroll down to find the “Titles” section and pick your option accordingly: Text, Scroll or Lower Thirds. For “Stray,” I used Text and Scroll.
“Text” was used to create the opening title card, a simple, customized font on a black background. I tried out several ideas for the placement of the text on the screen, and Resolve 12’s ability to click and drag on the canvas window made it very easy to land on the perfect design. It’s worth noting that in order to drag your text around the window with your mouse, you need to ensure that your “Transform” option is turned on (It’s the small rectangular icon below and to the left of your viewer).

The “Text” tool
The “Scroll” title tool was also used to create our credit crawl. In the past, I’ve needed to complete my end credits in some other third-party software, since the process of doing so in most other editing systems is fairly archaic. Resolve allowed me to again keep more of my workflow contained within the software.
3. Finishing and Color Correction
Although Resolve 12 has some extremely strong audio editing tools built in (including key framing, tape-style scrubbing, a built-in mixer and more), on this particular project the audio was sent out to a dedicated ProTools artist for the dialogue editing and final mix. Had I wanted to, I could have edited the audio myself within the Resolve timeline, but since I sent it out to ProTools, I was able to do so without the use of any third-party plugins. With my picture edit completed, I simply rendered out a video deliverable for my protools artist by using the “Export To Avid ProTools” preset on the Delivery page. Once the reference clip was created, I selected my timeline in the Edit page, and clicked File—“Export AAF, XML,” and of course selected AAF.

As my ProTools artist began the audio edit, I started working away on the color grading simultaneously. Moving from your offline edit to your color in Resolve is as simple as clicking the “Color” tab on the UI. This is really where the decision to complete the film from end-to-end in Resolve paid off. There was no offline/online process. No need to import an XML from another application and potentially have to re-link clips and reference a cutting copy to ensure it was synced up properly. I simply clicked over to the Color page, and I was ready to go.
As I began my color process, I toggled off “Use Optimized Media If Available,” which essentially turned my offline edit into an online color session. I didn’t need any real-time playback at this point, and I wanted to ensure I was grading and monitoring the RAW media (as opposed to the ProRes clips).
The color process went very smoothly and quickly as a result of some of the new tools and abilities of Resolve 12. The “Compound Nodes” feature in particular really helped to keep my project organized and my workspace de-cluttered, by allowing me to consolidate multiple nodes into a single node, much like how a nested clip would work in a timeline. I typically work with a lot of nodes (even on simple grades), and my node trees can become very complex, very quickly. By selecting large groups of nodes, right-clicking, and selecting “Create compound node,” my node trees were cleaned up in a matter of a few clicks, and I was able to work through the color process much more efficiently.
Another impressive new feature is Resolve’s powerful 3-D tracker, which increases the accuracy of tracking power windows by a landslide. While Resolve’s previous 2-D tracker was good, certain types of complex movements made it challenging for the tracker to work perfectly. The new 3-D tracker, on the other hand, will literally shift the perspective of your power window based on camera movement or angle of the subject in the frame. This translates to a much easier tracking process, and diminishes the need for keyframes in many cases.
The 3-D tracker
Once all of my main color work was complete, I used OpenFX plugins to add some film emulation. I will often use FilmConvert to give a final polish to my projects, and its integration with Resolve 12 through the OpenFX system was seamless. Rather than applying the FilmConvert emulation globally on the entire project, I actually went back into the Edit page and applied the effects to individual shots using the inspector. This allowed me to easily work within the timeline to make real-time changes to the film stock settings I was implementing. I could have also done this using nodes in the Color page, but chose to work this way out of personal preference.
After this stage, the edit and color was fully complete. My ProTools artist sent me his audio stems, and I was able to drop them back into the Resolve timeline and move on to the delivery stage.
4. Final Delivery
Using the recently re-designed Delivery page in Resolve 12, I set up numerous deliverables and added them to the render queue as a batch. More specifically, I used Resolve’s “Vimeo” preset from the Render Settings dropdown menu to create a Vimeo cut that could easily be shared with clients. I also created a full 4K master file (ProRes 4444) and a 1080p master file (ProRes 422HQ). All three individual deliverables were added to the Queue and rendered out immediately.

After working on Resolve 12 for “Stray,” I am certainly going to be utilizing it on many more projects to come—including my upcoming feature, which this short is based on. MM
Noam Kroll is an L.A.-based director, cinematographer and colorist. To view the full short film, visit noamkroll.com.
Unlike many other magazines, MovieMaker is completely independent. We rely on our readers for support to continue providing top-quality filmmaking guidance. If you liked this article, consider tipping us $1.
Share: